MIG welding 101 guide with the help of this thorough manual! We go over the process, resources, and other fundamentals of how it all works.
It takes a particular welding process to attempt to join two pieces of metal together because heat and tiny metal beads or wire create a liquid stream of metal that may be directed into the void between the two pieces of metal and essentially “glue” them together.
While there are other types of welding techniques, MIG welding is the process that industrial fabricators and enthusiasts alike utilize the most frequently.
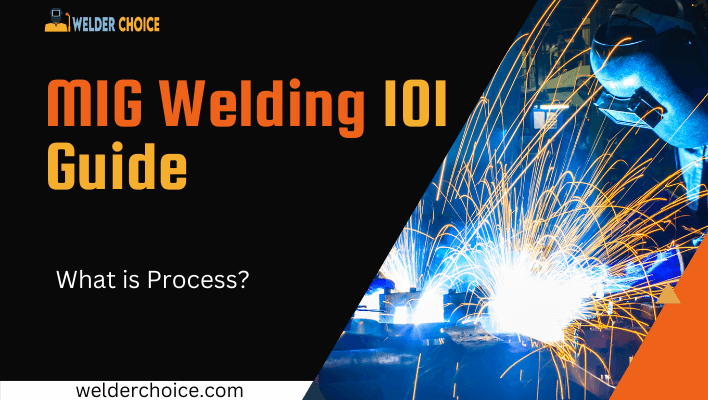
MIG Welding 101 Guide
MIG welding, also known as metal inert gas welding, is a process that involves using a MIG welding gun and a continuously-fed wire spool to burn, melt, and fuse together two pieces of metal.
The process is also known as “Gas Metal Arc Welding” (GMAW).
MIG welding was invented in the 1940s as an aluminum welding process. Developments in the utilization of semi-inert gases during the 1950s and 1960s made the process more applicable to heavy industrial operations like aluminum and steel.
MIG welding has emerged as the primary welding process for indoor industrial usage due to its adaptability and relative simplicity of learning. Anyone can learn to MIG weld, obtain a wonderful beginner’s welder like the Lincoln Handy MIG, and earn a respectable income.
MIG Welding Process
The consumable wire is fed through the connection in the metal that you want to weld together during the MIG welding process from a spool.
This is accomplished by melting the wire feed into a bead on the joint using a MIG welding gun that is powered by an inert gas and creates a high-heat arc.
A tight, smooth joint weld is produced by moving the welding gun down the junction at an adequate pace.
Pick The Wire You’ll Be Using
There are two typical wire types for steel. Use an AWS classification of ER70S-3 for welding for any purposes. If more deoxidizers are required while welding on corroded or unclean steel, use ER70S-6 wire.
For welding a variety of metal thicknesses in domestic and motorsports applications,.030-in. diameter wire makes a solid all-around choice.
Use a.023-in. wire to minimize heat input while welding thinner material. Use.035-in. wire (or.045-in. wire if it’s within your welder’s output range) for welding thicker material at greater total heat levels. In a different article, we talked about MIG welding stainless steel.
Decide If You Want To Use 100% Co2 Gas Or A 75/25 Gas Blend.
A shielding gas supply is required to run a MIG welding equipment in order to protect the work area from atmospheric nitrogen and oxygen, which can affect the weld’s quality.
In MIG welding, fundamentally only two types of gases are employed.
The most effective “all-purpose” shielding gas for carbon steel is a 75/25 combination of argon and CO2 (sometimes known as “75/25” or “C25”). It doesn’t encourage burn-through on thinner metals, has the least amount of spatter, and has the nicest bead appearance.
Although 100 percent CO2 offers greater penetration, it also produces more spatter and a rougher bead than 75/25.
Set The Appropriate Voltage And Amps.
The majority of MIG welding machines let you choose the wire diameter you’ll use and then dial in the thickness of the metal you’re planning to weld, allowing the machine to automatically choose the right voltage, amperage, and wire-feed speed for your project.
Pick the appropriate MIG welding technique. The position of the metal you intend to weld will have a significant impact on the MIG welding technique you use.
Flat Place
You want to send the filler metal straight into the junction while holding the welding gun at a 90-degree angle to the metal workpiece. To cover wider gaps, move a little back and forth.
A T-joint also referred to as a “fillet weld,” is the most typical type of weld. To produce an even weld bead and prevent undercuts, keep the gun at a 45-degree angle while making several welds passes.
Vertical Position
To prevent the filler metal from sliding over the bottom side of the weld joint while your metal workpiece is horizontal in front of you, you should angle your welding gun by 0-1 to 15 degrees.
Use weave beads to fill the weld joint and ensure the proper tie-in of the weld to the base metal if your metal workpiece is made of thick metal or the fit-up is inadequate.
Horizontal Position
Since you are welding against gravity, vertical MIG welding can be challenging. The voltage and amperage may need to be decreased by 10 to 15%.
To prevent excessive melt-through while welding thin metals, you should weld vertically downward. Weld downward, starting at the top of the joint, and point the wire away from the weld puddle.
You should weld vertically up for heavier metals. To help manage the size and shape of the weld puddle, start at the bottom of the joint and drag the welding gun up in a light weaving motion.
Overhead Position
Because you have to contend with both gravity and the welding gun’s speed, the overhead welding position can be among the most challenging welding positions.
To help keep the weld puddle small, you should reduce the voltage and amperage as well as utilize a wire with a smaller diameter. Make sure to move the welding gun quickly enough to prevent the weld metal from coming loose from the joint.
Pros And Cons Of MIG Welding
The MIG welding process has a ton of advantages, but there are also some disadvantages that welders should be aware of when choosing the best welding process for their job.
Pros
- Compared to other types of welding, MIG welding is a relatively straightforward and uncomplicated process to learn.
- You may weld a variety of materials, including mild steel, nickel, stainless steel, and aluminum, with MIG welding because it is so versatile and can be utilized for a wide range of metal thicknesses.
- The MIG welding process does not require a flux, making it possible to make welds of excellent quality. Slag getting stuck in the metal weld is therefore not a major concern.
- MIG welding is arguably the safest welding technique since the gas shield shields the arc and creates very little weld spatter.
Cons
- Due to the process for excessive melt-throughs and the high heat input required for MIG welding, these types of welds are not best performed vertically or overhead.
- A welding gun, a shielded gas supply, a constant power supply, a wire feeding system, and a source of cooling water are just a few of the intricate components that make up the MIG welding setup.
MIG Welding Advice For Novices
Buy The Right Equipment
Make sure you are properly attired for safety and that all potential fire dangers are removed from the welding area before starting any welding projects.
To protect your body and head from metal sparks and splatter, basic welding safety clothing includes leather shoes or boots, cuffless full-length pants, a flame-resistant long sleeve jacket, leather gloves, a welding helmet, and safety glasses.
Prepare the metal for welding thoroughly
Before striking an arc, use a metal brush to scrub the surface to bare metal. The performance of the wire feed will be impacted by any electrical impedance, so make sure your work clamp is connected to clean metal as well.
Bevel the connection to make sure the weld fully penetrates to the base metal in order to ensure strong welds on thicker metal.
Configure And Check Your Equipment
- Here is a quick checklist of what to do to get each project or job started:
- Make sure all cable connections are secure and free from fraying or breakage before starting an arc on welding equipment.
- DC electrode positive, or reverse polarity, is necessary for MIG welding. Verify the machine’s internal polarity connections.
- Set the flow rate of the shielding gas to 20 to 25 cubic feet per hour and turn it on. Apply a solution of soapy water and watch for bubbles if you think your gas hose is leaking. Install a new hose if you notice a leak in the old one.
- Poor wire feeding performance can be caused by either too much or too little strain on the drive rolls or the wire spool hub.
- Replace worn contact tips and liners, clean excess spatter from contact tubes, and throw away the wire if it appears to be rusty.
Get Creative with Your Welding Travel Speed
The welding bead’s shape and quality will depend on how quickly you run the welding gun along the metal component.
To assess the size of the weld puddle in relation to the thickness of the joint and to choose the proper gun travel speed, practice is required.
The size of the weld bead shouldn’t exceed the thickness of the thinnest piece of metal being welded.

With 8 years of experience a senior welding instructor and safety equipment researcher and writes articles, reviews and guidelines on helmets and other welding and safety gears at Welder Choice, and other written works have been published in various publications.