
So you began welding as a pastime and now want to pursue it professionally? We’ve got you covered with our step-by-step welding table plans.
For anyone who welds, regardless of skill level, a welding table is a must-have piece of safety equipment.
It’s a secure, solid, and fire-resistant platform on which to work. A tabletop and legs make up the majority of welding tables.
Certain types have an extra shelf beneath the tables for storage. Others may have a stay support framework that connects the legs and adds stability to the working environment.
Before we get into our particular plans, let’s take a look at the benefits of a DIY welding table.
Benefits Of Making Welding Tables Plans?
Buying a pre-fabricated welding table may seem enticing; after all, it is a quick and simple option. There are a variety of products to choose from, many of which are cheaply priced.
However, don’t overlook the benefits of making your own welding table. After all, you already have the skills, so why not make the most of them?
You get to design and construct a piece of machinery exactly how you want it.
Portability
Welding tables bought in a store are often large and heavy. They’re difficult to move and transport.
By making your own welding table, you can create a product that is far more lightweight and portable. This also means it may be easily moved around your desk.
Customize It To Suit Your Own Needs
You have complete control over the end product when you create your own welding table. In general, 4 feet by 6 feet is a nice size, but it all depends on your needs.
Aside from the size, height, and weight of the table, there are a few more considerations to think about.
You can add an equipment shelf or drawer to make storing and accessing your tools easier while working.
For mobility, wheels can be added to the table, allowing it to be moved without the need for heavy lifting.
You can also make your table collapsible or divide to make storage easier. If you only have a little amount of space or need to move your table around, this is extremely useful.
Choose The Materials To Be Used In The Building
Everything from the material type to the thickness and fastenings is under your control when it comes to the table’s construction. This means you can create a table that is perfect for its intended use.
Consider how much welding you’ll be performing and what kind of welding you’ll be doing. Is it going to be a light or heavy duty job? Think about the tools you’ll be utilizing and the regions you’ll be welding.
If you’re skilled, you might be able to get some, if not all, of your resources from scrap rather than buying them in a store.
This could be a problem if the parts are unequal. However, it is a cost-effective and environmentally friendly solution that should be considered. If you’re not sure what’s ideal for you, go to a store and get the items you need to make the table safer and easier.
Welding Table Plans: What is the Best Material
You’ll need a tough, fireproof material for the top and structure of your welding table.
Because aluminum is so light, it’s tempting to use it as a welding table. However, the melting temperature of this metal is far too low to be used safely.
The ideal metals to use are cast iron or stainless steel.
If you’re only conducting light welding, a sturdy wooden table with a sheet of metal fastened to the top would suffice.
Keep in mind, though, that this is not recommended for heavy-duty work. It’s better to create a proper table than to risk an accident or injury by using a lousy improvised one.
A Step-by-Step Guide on Making Your Own Welding Table Plans

There are the following steps to make the welding table
1. Choose Your Materials
The first step is to choose your materials. These can be bought from a store or other supplier, as well as a scrap yard, as previously stated.
Purchasing from a retail outlet is the most expensive option, followed by purchasing from a wholesaler, which can save you up to 50%. The most cost-effective solution is to find some scrap metal.
To create a simple welding table, you’ll need the following materials:
- Steel angle iron is used for the table legs, frame, and support stays.
- The tabletop is made of sheet metal, with a shelf beneath it if necessary.
- 4 inches of metal tubeingwith a diameter of 11/2 inches and a thickness of 1/8 inches, with a diameter of 112 inches and a thickness of 18 inches
- Four casters with brakes
- Four galvanized nuts are used to fit the casters.
If you want to paint any of the table’s components, you’ll need rust- and flame-resistant paint. Make sure the paint is suitable for metal surfaces before applying it.
Make sure you have all of the essential safety gear, such as a welding cap, helmet or goggles, gloves, and protective clothing, before you begin.
You should make sure your workspace is appropriately ventilated even if you’re using an exhaust ventilator.
2. Gather The Tools
You’ll need a MIG welder for the most part, as well as an angle grinder to smooth down any rough edges.
If you need to cut your supplies to size, you’ll need a large metal saw with carbide teeth.
Check your neighborhood to see if you can rent or borrow one, as they can be expensive, especially if you won’t be using it much.
You’ll need a few clamps to keep the table in place and ensure it stays aligned once you’ve begun creating it.
Wire cutters, a square, and a tape measure are among the other tools you’ll need.
3. Cut The Metal Into The Appropriate Size
Cut goods to size with a metal saw, which is often the case when they are manufactured from scrap. Check to see if the saw is large enough, has carbide teeth, and is designed for metal rather than wood.
The blades of a miter saw meant for wood spin too fast to be used on metal. As a result, the saw and motor may be destroyed.
Of course, the table and shape of your table are entirely up to you, but it should be between 25 and 32 inches square.
The height will vary based on your height and how you prefer to work, but a table leg height of 30 to 35 inches is a good starting point.
After you’ve cut the metal pieces to the proper size, use an angle grinder to remove any sharp edges.
This will make the building process easier and improve the overall look of your finished table.
4. Weld The Frame
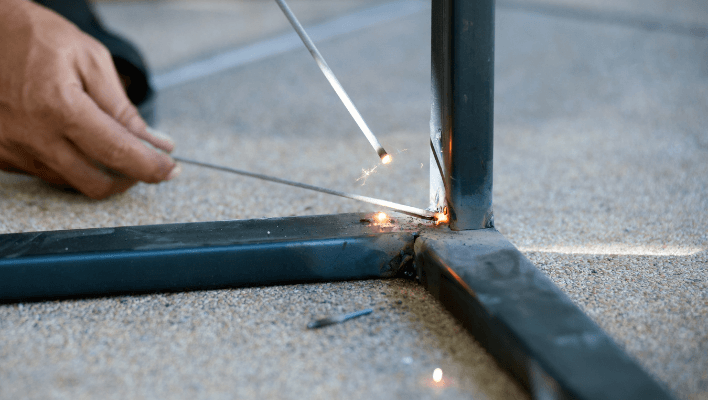
You’ll need to line up an angle iron that’s the proper size to make the frame. To do so, check that the components are exactly aligned at 90 degrees with your square.
Use a clamp to hold the two sections together while tacking them together. Rep with the remaining two pieces before joining the two halves.
If you want to add another shelf beneath your table top, repeat the process.
5. Join The Tabletop In The Right Place
You can attach it by placing the sheet metal over the square frame and fastening it to the frame. After confirming that all of the corners have been tacked, add a few more along each side of the frame.
Once the tacks are complete, do careful welds to bind the table top to the frame. Repeat the process with your shelf if necessary, and you’re ready to attach the legs.
6. Join The Table Legs Together
Use your square to align the first table leg to the top and shelf once more. Tack it together first before producing full welds.
Carry on in the same manner with the remaining legs. Check that they are all completely attached to the sheets before attempting to stand the table up.
7. Paint The Table And Add The Accessories You Want
Add any extra features or accessories as the final step. You could add wheels to your table with the casters and nuts.
Weld the metal tube to the frame to build a suitable welding gun holder. You might also add some extra storage drawers or compartments.
Once the table is completely built, you can paint it. Make sure all surfaces are clean with an adequate solvent before painting.
Make sure the table’s surface isn’t painted. It’s crucial that the metal isn’t coated, as this could pose problems when welding.
FAQs
Is welding on a metal table required?
Welding is not required for a metal table. Welding on the ground or on concrete is both safe and effective. On the other hand, welding on a metal table is the safest way.
How big should my welding table be?
The type of welding you’ll be undertaking will decide the size of your welding table. You’ll want one that’s around 6 feet by 4 feet in size. It can be much longer (for example, 7×4), but it all depends on the type of welding you’ll be doing and the amount of room you have.
What exactly is the function of a welding table?
A welding table is a metal table that is built for maximum welding safety. The metal on the surface prevents anything from catching fire and also provides stability.
Final Thoughts
Even if you have the best welding table plans, you’ll need to schedule some time to build it. When opposed to purchasing a commercially manufactured welding table, making your own offers numerous benefits.
You get to choose the table’s size, as well as the materials it’s made of and the features it has.
Consider your needs and welding habits to create a table that is completely customized to your interests.