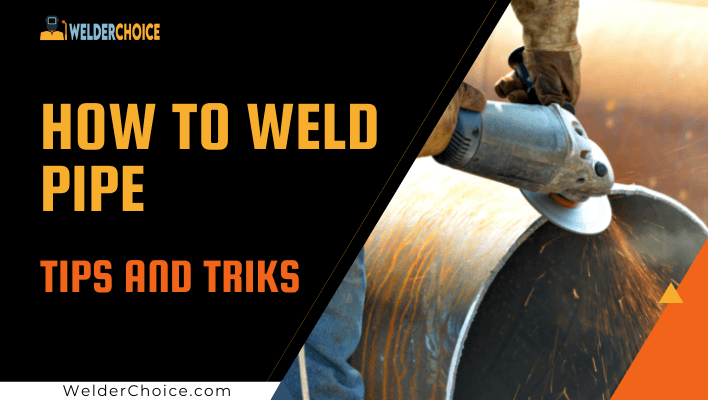
Many welders want to know “how to pipe weld” in a better way.
Two pipes can be joined together by pipe welding or pipe construction. This can be accomplished using a variety of welding processes, including arc welding, MIG welding, TIG welding, and others.
Pipe welding is far more difficult and complex than welding flat metal sheets since it entails combining pieces of bent metal. It joins cylindrical metal tubes using a gas-shielded arc welding method.
The most popular choice for situations involving pipe welding is TIG welding.
How to Pipe Weld?
The Basics of Pipe Welding
Since thick, heavy-duty materials are frequently used in pipe welding, attention must be given to ensure that you get full penetration due to the open-root character of the welds.
In difficult, industrial pipe welding jobs, poorly penetrated welds can have disastrous results. To avoid this potential issue, it is advised to utilize a groove weld since it is doubtful that you would be able to weld from both the internal and external sides of the pipe.
Any welding task requires advanced planning. Make sure that you have everything you need for safety and protection, including an auto-dark helmet, an apron, clothing that resists flames, safety goggles, work boots, and earplugs. Before you start the actual welding, prepare and clean your materials.
Depending on whether they are right- or left-handed, welders have always had a good and bad side in the welding business. The pipe typically presents a challenge on the opposite side of your dominant hand, therefore right-handed welders face a challenge on the left side of the pipe and vice versa.
Gravity will always affect the weld pool, therefore regardless of whether the site is advantageous to you, handling the bottom portion of the pipe will always be more difficult than handling the top.
The most popular method for pipe welding without an attached base plate is known as “open root welding.” Since you’ll effectively be welding over a gap, which is pretty challenging, you must use the right method to prevent ruining the entire operation.
It is recommended that you start by tack welding your materials together. You’ll have enough time to weld thoroughly, precisely, and carefully if you take this procedure. Cut off and feather your tacks to lessen the number of flaws in the final product.
Never start a pipe weld and break it in the gap; always do it on the sidewall. The arc should serve as the formation point, and once it has formed, the weld pool should be gently and progressively transversed from corner to corner onto the opposite side. When it becomes necessary to change positions, slowly crisscross the surface along the initial segment of the pipe’s open root.
Last but not least, segment your pipe. Start at the top and move clockwise, stopping at 45-degree angles to ensure that you are at ease and prepared for the next move. Make sure to properly interweave all of your tasks while you’re about it. Continue doing this until the entire weld has been thoroughly turned.
Positions in Pipe Welding
One, two, five, and six (1, 2, 5, 6) are the four top pipe-welding positions highlighted below:
Rolling 1G in position
The 1G position, which is the most fundamental welding position, is rarely used. Because the pipe will be lying on its side, the horizontal position in which you can rotate as you weld is comparable to flat welding. As your pipe rolls away from you, your weld position should be in the center of the puddle. The welding is done on the top of the pipe while the welder’s position is fixed.
Your arc should start at the middle of your tack for a good weld at the 1G position. The drag angle between your rifle and pipe should be between 5 and 10 degrees. Your stick out should be no more than 5/8 inches.
The Position 2G
The pipe can be turned along the vertical (Y) axis when in the 2G welding position, where it is in the vertical position. Welding is done on the side of the pipe in a horizontal direction while the welder’s position stays stationary.
Another constant position is 2G. Because of this, you cannot weld while the pipe is rotating. The pipe is placed on its bottom portion while in a fixed position to increase welding stability.
Fixed Position 5G
The pipe is horizontal while it is in the 5G welding position. The pipe is in a permanent position, as opposed to the 1G position, so the welder must move around the pipe in a vertical direction to accomplish the welding because the pipe cannot be rotated.
With 5G, welding starts at the middle of a tack weld with a matching stick sticking out the length and a 5 to 10-degree drag angle. You must grind out your starts and stops after finishing the root pass before moving on to the fill passes.
Position 6G for Pipe
Due to the fact that the pipe must be fixed at a 45o angle, the 6G welding position is highly demanding. This means that welding is carried out in all regions while including the welder’s stronger and weaker sides.
The pipe slopes at roughly 45° from the X-axis (horizontal) or 45° from the Y-axis (vertical). Since the pipe is fixed in position, welding must be done by the welder moving around the pipe. This is a high-level welding position that calls for extensive technical knowledge and experience.
Testing Your Pipe Welding
Testing enables you to assess the overall caliber of your work as well as the strength (or weak spots) of your pipe welding.
The methods for assessing pipe welds using non-destructive testing (NDT) are highlighted here. NDT refers to the requirement that the welds remain intact while being tested for strength and quality without disassembling your pipe weld.
X-ray analysis
It is utilized mostly in situations where the weld quality is crucial for safety reasons and is the most practical way to find internal weld flaws. Because it functions similarly to x-rays taken of the human body, only trained professionals should perform it. Although it continues to be the most efficient, this method is also the most expensive.
Break Test For Fillet
This test aims to evaluate root penetration, as well as the weld’s possible failure spots, which are typically the start and end of a weld. The test is successful if the weld bends without breaking. Cracks and fractures are permitted, however, they must never extend over 10 mm.
Liquid Dye Penetration
You spray a dye onto the metal surface in this test. Any surface imperfections are allowed time to be filled by the liquid, and any extra liquid is wiped away. When the surface dries, the dye brings to light any flaws that were previously hidden from view. In addition to being more efficient than a visual inspection, it is also more affordable.
Macro-etch Testing
Cutting a sample from the welded joint, polishing it, and then applying an acid solution are the steps in the procedure. They will display fractures, center voices, unsoundness, pinholes, inclusions, porosity, grain size, hydrogen flakes, mold slag, and other faults, allowing you to inspect your macro-structural integrity.
Bending Test
Conducting bend tests is primarily done to ascertain a material’s stiffness against breakage. Typically, the specimen is bent 180 degrees.
By applying tension in these locations, the bend test evaluates the quality of a weld at the façade (face) and foundation (root) of a welded connection.
Examination of the Weld Visually
The oldest, cheapest, quickest, and simplest method is this one. Where bad welds do not pose a threat, it is frequently done by qualified inspectors. It involves evaluating the weld’s quality subjectively and looking for discontinuities and faults that might prevent the pipe system and weld failure. However, this technique is completely ineffective for identifying interior weld flaws.
Common Errors in Pipe Welding
Pipe welding mistakes can occur whether you are a novice or an expert, and knowing what they are can help you avoid making them. Pipe welding procedures must be of the highest quality because flaws can seriously affect both machinery and human life. Read more about these real-life occurrences and their effects in the context of the Kursk Submarine Disaster and the faulty weld examples.
Let’s look at some typical errors in pipe welding that can be prevented:
Inadequate preparation
In the pipe of welding pipes, preparation is essential. The required penetration and weld strength are ensured with the help of proper cleaning, joint preparation, and component fit-up. Before welding, grind the surface to make sure the edges to be welded are smooth.
Applications for pipe welding need excellence and reliability. Only by taking the time to carefully follow the instructions and make sure that the weld is properly prepared beforehand can you achieve long-term productivity in terms of time and expenses.
Spatter
The dispersion of material that has melted on or around your welding arc is referred to as a spatter. Using shorter arc lengths, applying the proper polarity, and reducing currents while raising the working angle can all help to lessen this. Additionally, make sure you are traveling at the appropriate angle for that specific weld.
Misaligned components
In pipe welding, parts fit-up is a regular operation, but occasionally welders speed through their jobs and omit this crucial stage. Situations like a bevel with an excessively steep angle are typically the result of misaligned pieces.
Porosity
Nitrogen, oxygen, and hydrogen are absorbed into your weld pool when you don’t grind and clean the surface before welding it, which results in porosity. Porosity in the welds can also be caused by a brief interruption in the gas flow.
Undercutting
This is caused by a number of problems, including extremely high voltages, protracted arcs, inappropriate angles, using the wrong electrode for the plate’s depth, and welding at an erratic speed. Once you make the necessary corrections, undercutting will no longer occur.
Cracks
Cracks are challenging to fix since they need to start a fresh weld from scratch. Therefore, prevention is crucial in this situation. By utilizing the right temperature, properly polishing the surface before welding, and cleaning the plate edges to ensure a snug fit, you may avoid cracks.
Slag
Slags are mostly caused by flux coating. A welder must utilize the proper speed and angle, clean the interior of weld passes, and ensure that the welding wire’s voltage setting is precise in order to reduce the formation of slags.
Conclusion
A precise and durable weld is necessary for the field of pipe welding. The preparation stage is crucial, and welding will be difficult if you don’t set aside some time for it.
The best welders are those who take the initiative to thoroughly comprehend all the techniques required to produce a flawless weld connection and go above and beyond the fundamental act of welding.
Because pipe welding is a difficult profession, individuals who master it have an advantage in their careers because there are countless chances. As they get to acquire new strategies every day, they advance in their careers.
Therefore, to maintain competitiveness in a sustainable manner, stay active by earning the required certifications from a recognized institution, and constantly honing your skills to keep up with the changing market expectations.

With 8 years of experience a senior welding instructor and safety equipment researcher and writes articles, reviews and guidelines on helmets and other welding and safety gears at Welder Choice, and other written works have been published in various publications.